Winding: Part 4
- Published: March 06, 2023
Winding Best Practices
By Neal Michal, Principal, Converting Expert, LLC
Previously we have discussed wound roll mechanics, how to document your roll structure, and the importance of tension, nip and torque. This month we will discuss best practices for winding — addressing safety, delivered quality, process health cleaning and process controls — and will close with information for your technical team.
Safety
OSHA’s general duty clause [Section 5(a)(1)] requires employers to provide a safe working environment. OSHA reports that total workplace injuries have leveled off since 1992, but fatalities have increased 18 percent over the last decade. The winder is the business end of the machine and there are dozens of interactions every shift between the winding process and your operators and maintenance personnel.
Hoists, thread up and access to running nips are known hazards with any winder. Read and understand the original OEM documentation. Never modify a safety system designed by the OEM. If an improvement can be made, consult with your OEM before proceeding.
Insure all guards are in place. If new guards are required, insure they are robust and follow OSHA and/or EU requirements.
Inspect hoist straps, cables and below the hook devices each shift for signs of wear. Below-the-hook devices include spreader bars and J hooks used to carry the coreshaft or finished roll. All below-the-hook devices should be fabricated with traceable materials as per a PE stamped drawing. Hoists should be inspected annually by an outside firm. File all PE stamped drawings and hoist inspection reports for retrieval in the future.

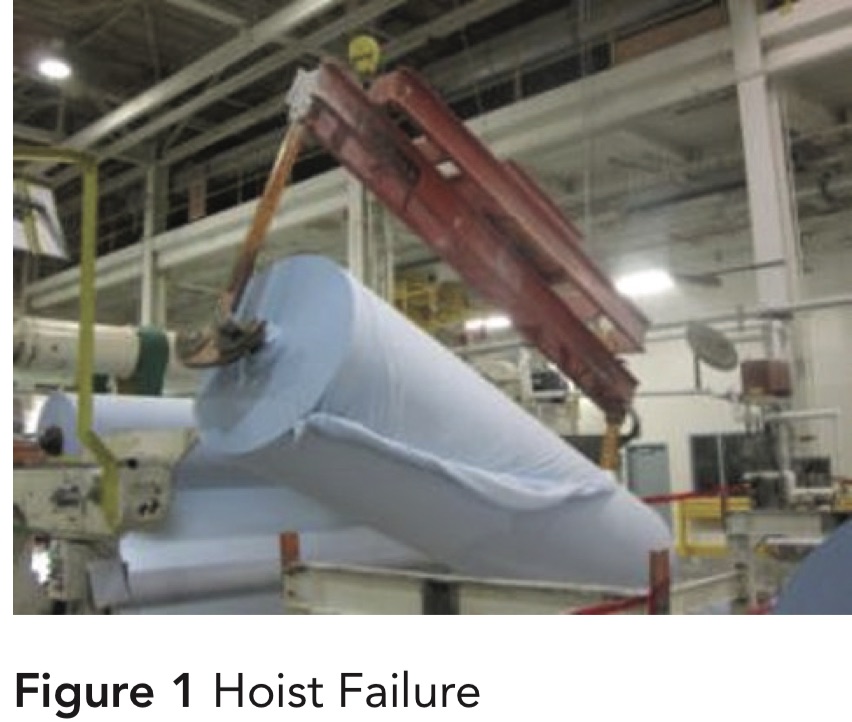
Audit hoist practices. Never stand under a suspended load. Establish a safety zone around the perimeter where a coreshaft or finished roll will travel (Figure 1). Highlight this area with guards and visual alerts such as painted floors.
Establish and follow safe work practices. Provide training to new operators. Provide refresher training for experienced operators. Develop a formal documentation system to insure required checks are being done each shift. Use proper PPE when cleaning or handling slitter blades, anvils and cutoff knives.
Audit how operators thread up the winder. Carefully consider the use of driven rope thread up systems. The safest thread up is done with the machine locked out.
Conduct formal risk assessments for new equipment, modified equipment and after a significant change in operation. Pursue interlocked guards when required to manage risk.
Delivered Quality
Quality is a management function. When quality is right, your customers will feel it. When quality is bad, your organization will feel it. Consider the look and feel of quality from your customer’s eyes. Work with your customer to document what is important. Read and understand the specification for each grade.
Mill work requirements include core ID and wall thickness, web width, length and roll diameter. They may also include requirements for roll straightness, absence of debris, slit edge quality, max roll weight and dimensions for an offset core.
There are several methods to establish roll structure: roll hardness, roll density, average in roll caliper, average in roll strain and roll length to diameter. Refer to the previous articles that describe wound roll mechanics and how to document interlayer pressure and through roll strain.

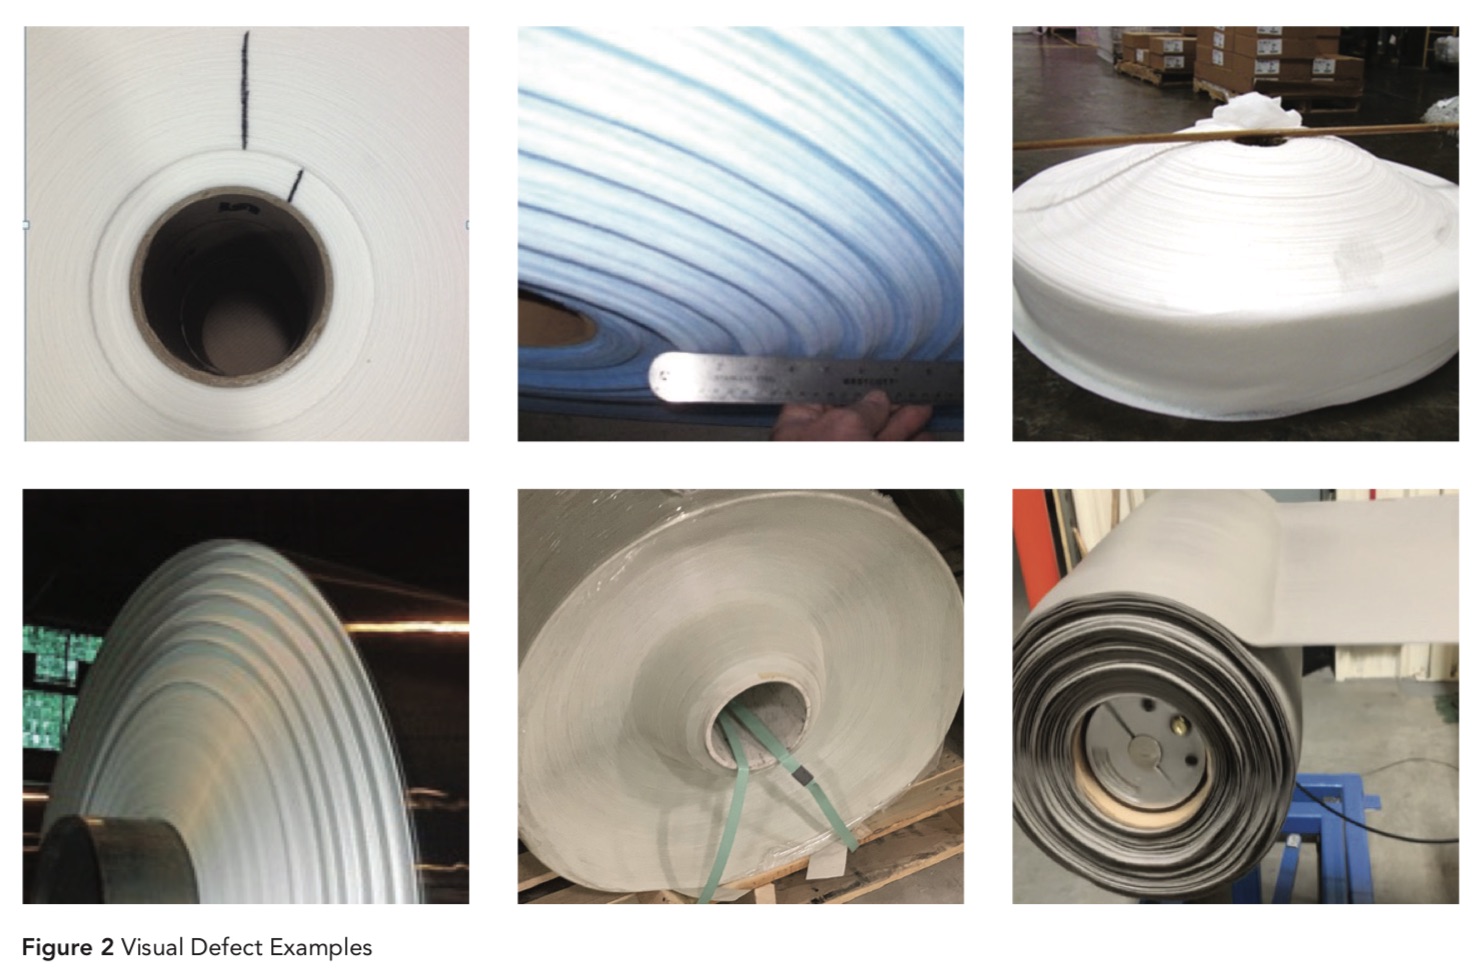
Any visual defect can become a quality concern. Establish visual standards for all potential defects. These standards should include a picture of the defect, name, potential cause and action steps to correct (Figure 2).
Download and print a copy of the good run settings with limits for the current grade. Operators should check each process input and initial them. Make note of any process setting that is beyond the limits. Escalate any discrepancy to management.
Process Health Cleaning
Routine cleaning of your process is a best practice to improve delivered quality and productivity.
Establish minimum expectations for routine process health cleaning. Identify items to do during short downs, at shift change, weekly, monthly and during PMs. Clean idlers, bow rolls, nips, drums, kitchen rails and linear bearings. Spin each roller by hand, note bearings that should be replaced. Clean debris away from coreshaft bearing journals. Clean up any debris around the winder. Make note of any obvious leaks or metal shavings. Write work orders for repairs. Work with maintenance and engineering to correct persistent issues.
Process Controls
It is amazing how many winders have inadequate process controls. Winder OEM’s may not provide the required information to determine web tension, nip load and torque.

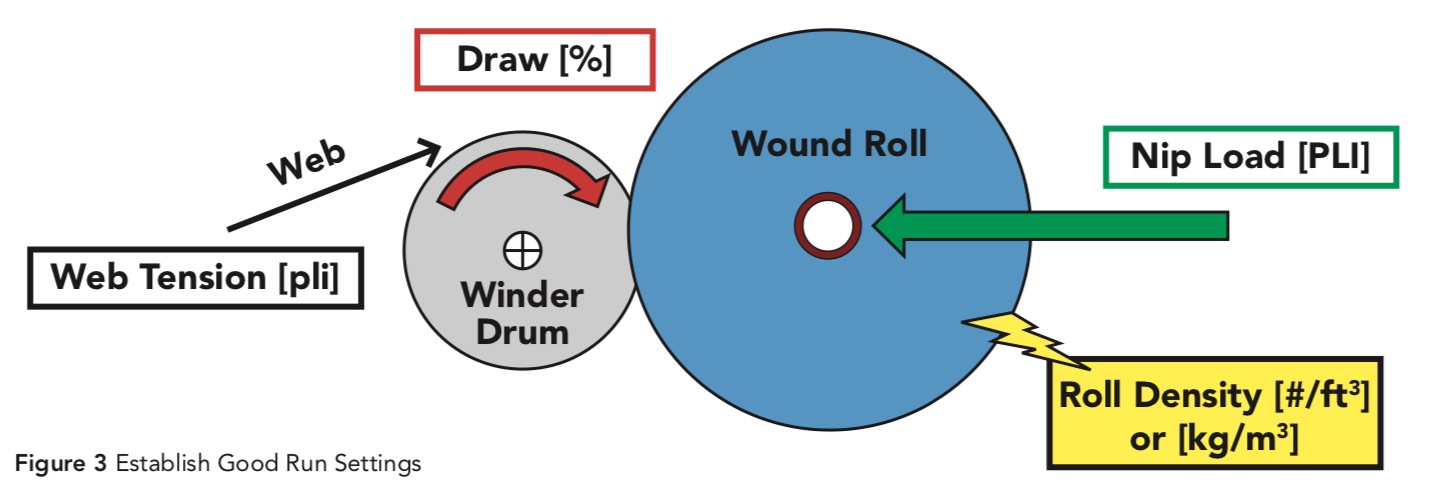
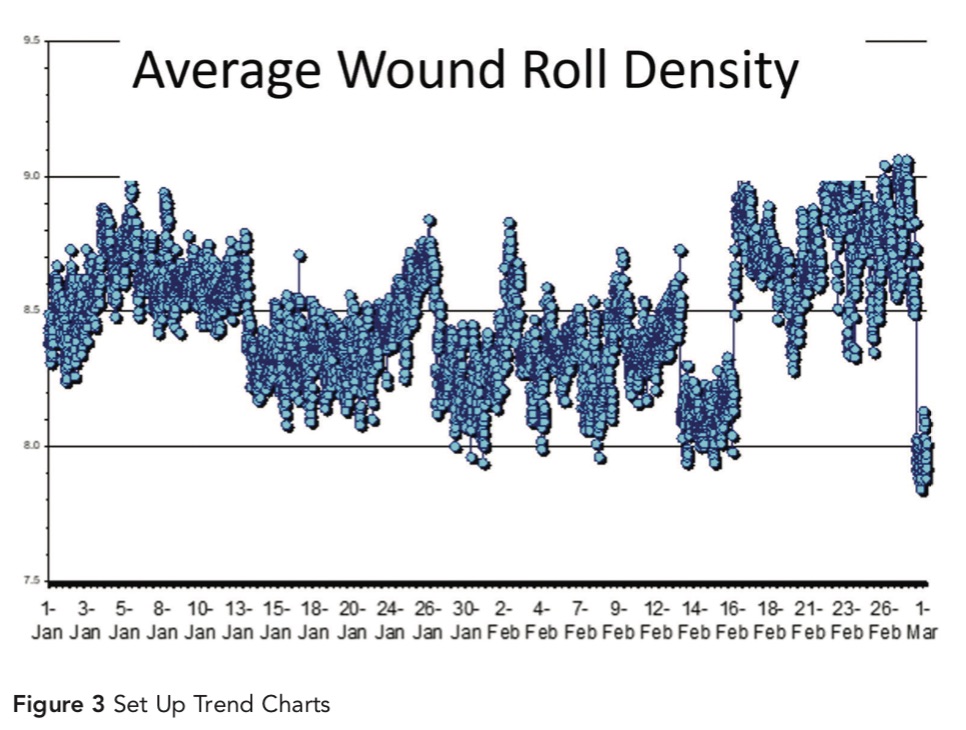
Start with your field devices. Calibrate load cells, pneumatic controllers and position feedback sensors annually or anytime they have been replaced. Establish good run settings for draw, tension, nip and torque by grade (Figure 3). Set up trend charts to monitor winder settings, roll density, hardness or other required metrics. Use them to document when shifts occur.
Train lead operators and maintenance on how to interpret the trend charts. Conduct capability studies to document upper and lower control limits for process settings. Correlate these inputs to the outputs that are important to your customer. Evaluate each SKU and grade against actual process capability. Escalate any discrepancy to management.
Technical Team: Engineering and Maintenance

Read and understand the original OEM documentation. Develop process and instrumentation drawings that highlight all field devices with a clear understanding how the winder is controlled. Include important PLC tags for process variables. Use trend charts to document shifts in process capability (Figure 4).
Establish required preventative activities for weekly, monthly and annual checks. Check cylinders for leaks, worn bushings, misalignment couplings and damaged supply lines. Replace any worn out bearings in the idlers and power train components. Watch several winder sequences. Look for any odd or unexpected movements at each pivot or sliding member. Inspect gear boxes and couplings for excessive clearance. Check sprockets, chains, pulleys and belts for proper tensioning. Re-check alignment after any critical com- ponent has been replaced.
Track unexpected failures to determine if additional investigation is required. Investigate any situation when the operators were required to operate outside of established upper or lower control limits.
Up next, we will conclude our winding study with a focus on common roll defects, discussing what causes them and how to correct them.
About the Author
Neal Michal of Converting Expert is a well-known authority in web handling, process design and optimization. He worked with the Web Handling Research Center for 20 years. Currently serving as a technical advisor with AIMCAL, he can be reached at This email address is being protected from spambots. You need JavaScript enabled to view it. or through www.convertingexpert.com.


